Generate a CSR for WLC webauthentication
Last week i was instructed to prepare our Wireless LAN Controller to work with
the webauth 3rd party unchained certificate for external visitors.
We want to provide a certain security feeling for the customers, if they combine with us about wlan access.
Background Information
By default, WLCs use a built-in self-signed SSL certificate. The WLCs use this SSL certificate in one of these situations:
- When the clients try to connect to the WLAN network with use of SSL-based web authentication
- When a user tries to log in to the WLC with use of Secure HTTP (HTTPS) (WebAdmin authentication)
You are prompted to accept the certificate from the WLC, because the clients do not have a trusted root certificate for the certificate that is installed on the WLC.
The SSL certificate on the WLC is not in the list of certificates that the client system trusts.
There are two ways to stop the generation of this web-browser security alert popup window.
- Use the self-signed SSL certificate on the WLC and configure the client stations to accept the certificate. Include the self-signed certificate on the WLC in the list of certificates that are trusted on the client station.
- Generate a CSR and install a certificate that is signed by a source (a third-party CA) for which the clients already have the trusted root certificates installed,
such as VeriSign.
In our case the 2nd one.
CSR
A certificate is an electronic document that you use in order to identify a server, a company, or some other entity and to associate that identity with a public key.
CAs are entities that validate identities and issue certificates. The certificate that the CA issues binds a particular public key to the name of the entity that the certificate identifies (such as the name of a server or device). Only the public key that the certificate certifies works with the corresponding private key that is possessed by the entity that the certificate identifies. Certificates help prevent the use of fake public keys for impersonation.
A CSR is a message that an applicant sends to a CA in order to apply for a digital identity certificate. For the most part, a third-party CA company, like Entrust or VeriSign, requires a CSR before the company can create a digital certificate.
CSR generation is independent of the device on which you plan to install an external certificate. So a CSR and private key file can be generated on any individual Windows or UNIX machine. CSR generation is not switch-dependent or appliance-dependent in this case.
Because the WLC does not generate a CSR, you must use a third-party application such as OpenSSL in order to generate a CSR for the WLC.
You can find a tutorial here, but it doesn’t work.
Link to cisco explanation
Now, i explain the steps that must be done to get a proper function and to be downloadable for the wireless lan controller.
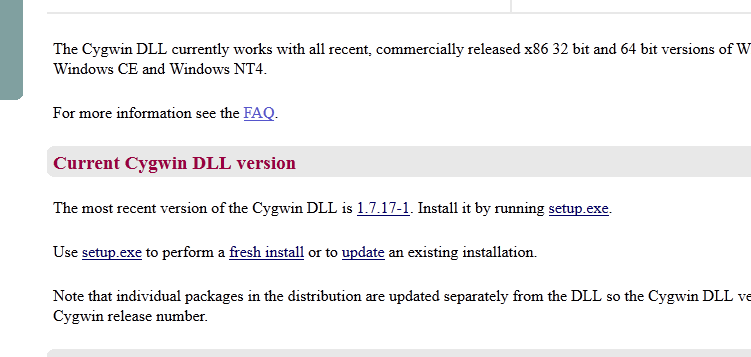
1. Download openssl (for example for win7) from http://www.cygwin.com/ download the setup.exe
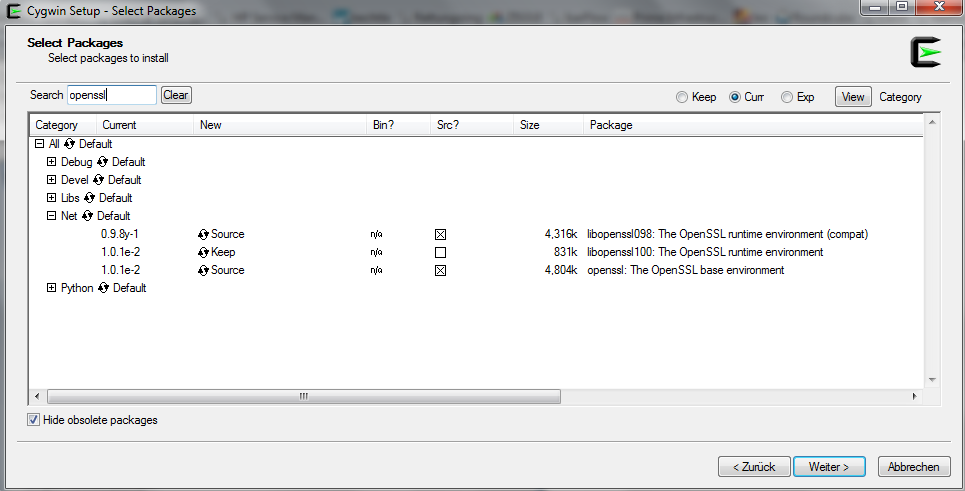
2. run setup.exe and follow the instructions.
Look at the following figure – choose only the appropriate packages.
3. Go further and finisch the installation process.
After that open the cygwin terminal
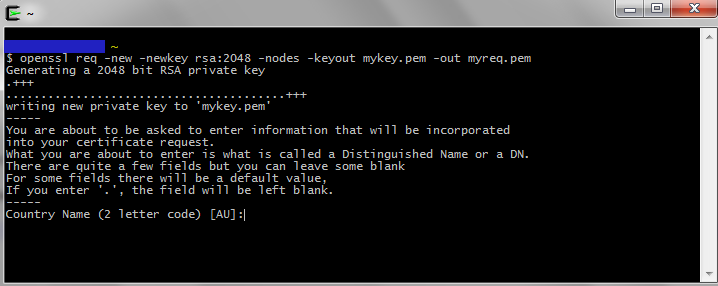
Open your Cygwin Terminal and generate the private key
we use rsa encryption 2048
With this command you generate to files.’mykey.pem’ and ‘myreq.pem’.
This two files were needed to get a valid CSR from your provider.
The returned CSR file looks like this: ‘servpass-440829-x509chain.pem’
And now you have to merge the CSR ‘servpass-440829-x509chain.pem’ and the generated public key in the right format.
You have to encrypted the private key in Triple DES
Take for example notepad++ and edit the ‘servpass-440829-x509chain.pem’ and ‘keyout.pem’
Like this:
—–BEGIN CERTIFICATE—–
Device cert
—–END CERTIFICATE—–
—–BEGIN CERTIFICATE—–
Intermediate cert
—–END CERTIFICATE—–
—–BEGIN CERTIFICATE—–
Root Cert
—–END CERTIFICATE—–
—–BEGIN RSA PRIVATE KEY—–
Proc-Type: 4,ENCRYPTED
DEK-Info: DES-EDE3-CBC,
—–END RSA PRIVATE KEY—–
Save the file as ‘final-cert.pem’ for example.


A powerful share, I just given this onto a colgualee who was doing a bit analysis on this. And he the truth is bought me breakfast as a result of I discovered it for him.. smile. So let me reword that: Thnx for the treat! However yeah Thnkx for spending the time to discuss this, I feel strongly about it and love studying extra on this topic. If doable, as you develop into experience, would you mind updating your weblog with more details? It is extremely helpful for me. Massive thumb up for this blog put up!
Thx! It’s a question of time.
I will update this topic as soon as possible with a deeper insight.