Repair a corrupted IOS Image on a LWAPP
Introduction
Here i would like to describe, how to set an access point to factory default.
My prefered manner is to formatting the flash of an access point,
copy the IOS Image from a tftp server and extract the tar file.
You need to execute some special command to extract the tar file.
If you copy only the tar file to the flash, it doesn’t work and the access point are not able to boot from the image.
content
- my favorite factory default procedure
- overwrite an ios image
- downloading automatically from rommon mode and access an tftp server
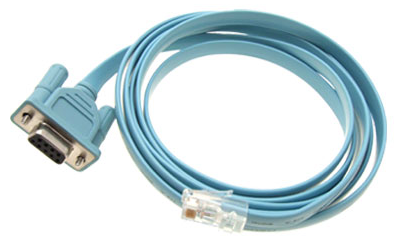
- You do not need a special crossover cable to connect your PC to the access point;
you can use either a straight-through cable or a crossover cable.
For the special doing you need a console cable (R232) and a straight through patch cable.
Connect the R232 cable and the patch cable with your PC and the access point shown on the following figures.

1. my favorite factory default procedure (totally formatting flash)
- plug in the serial cable into the DB9-to-RJ-45 Console Port on the access point vice versa to your PC.
- plug in the straight through cable into the RJ-45 ethernet0 Port vice versa to your PC.
- start your tftp server program (tftp server)
- copy your IOS Image to the tftp server program and the appropriate folder. For example D:\tftp32-files
- the IOS file is named “c1240-rcvk9w8-tar.123-11JX1.tar”
- change your NIC ethernet setting on your PC to IP: 10.0.0.3 Netmask: 255.0.0.0 and Default Gateway: 10.0.0.1
also set the ip address on the access point for example IP_ADDR:10.0.0.2 DEFAULT-ROUTER:10.0.0.1 NETMASK:255.0.0.0 - unplug the powersupply and press the mode button. plugin the powersupply and press the mode button for approximately for 30 sec.
- waiting for the status LED on the access point is blinking red.
- after that – release the mode button.
- use the terminal emulator program to see the output of the boot process, where the access point boot into rommon mode.
1. starting into rommon mode
ap: Xmodem file system is available.
flashfs[0]: 8 files, 4 directories
flashfs[0]: 0 orphaned files, 0 orphaned directories
flashfs[0]: Total bytes: 15998976
flashfs[0]: Bytes used: 3771392
flashfs[0]: Bytes available: 12227584
flashfs[0]: flashfs fsck took 26 seconds.
Base ethernet MAC Address: 00:23:5e:04:0b:b8
Initializing ethernet port 0…
Reset ethernet port 0…
Reset done!
link auto-negotiating….
auto-negotiation takes 10000 milli-seconds to complete
ERROR: timeout waiting for auto-negotiation to complete
ERROR: fail to bring ethernet link up
The system has been encountered an error initializing
ethernet port. You may need to check hardware
The system is ignoring the error and continuing boot.
If you interrupt the system boot process, the following
commands will reinitialize ethernet, tftp, and finish
loading the operating system software:
ether_init
tftp_init
boot
button pressed for 20 seconds
process_config_recovery: set IP address and config to default 10.0.0.1
process_config_recovery: image recovery
ap:
2. format flash:
ap: format flash:/
Are you sure you want to format "flash:" (all data will be lost) (y/n)?y
flashfs[0]: 0 files, 1 directories
flashfs[0]: 0 orphaned files, 0 orphaned directories
flashfs[0]: Total bytes: 15998976
flashfs[0]: Bytes used: 1024
flashfs[0]: Bytes available: 15997952
flashfs[0]: flashfs fsck took 20 seconds.
Filesystem "flash:" formatted
ap: dir
List of filesystems currently registered:
flash[0]: (read-write)
xmodem[1]: (read-only)
null[2]: (read-write)
tftp[5]: (read-only)
3. initial ethernet; flash drive and tftp
ap: ether_init
Initializing ethernet port 0…
Reset ethernet port 0…
Reset done!
link auto-negotiating….
auto-negotiation takes 10000 milli-seconds to complete
ERROR: timeout waiting for auto-negotiation to complete
ERROR: fail to bring ethernet link up
ap: flash_init
Initializing Flash…
…The flash is already initialized.
ap: tftp_init
### set the IP addresses on the Access Point in rommon mode###
ap: set IP_ADDR 10.0.0.2
ap: set DEFAULT_ROUTER 10.0.0.1
ap: set NETMASK 255.0.0.0
ap:
4. execute the tar command
extracting info (273 bytes)
c1240-rcvk9w8-mx/ (directory) 0 (bytes)
extracting c1240-rcvk9w8-mx/c1240-rcvk9w8-mx (1865438 bytes)……………………………………………………………………………………………………………………………………………………………………………………………………………………………………………………………………………………………………………………………………………………………………..
extracting c1240-rcvk9w8-mx/info (273 bytes)
extracting info.ver (273 bytes)
5. boot again (the default enable password is ‘Cisco’)
ap: boot
Loading "flash:/c1240-rcvk9w8-mx/c1240-rcvk9w8-mx"…#############################################################################################################################################################################
File "flash:/c1240-rcvk9w8-mx/c1240-rcvk9w8-mx" uncompressed and installed, entry point: 0x3000
executing…
.
output interrupted
2. overwrite an ios image (the AP runs properly and is online) – connecting via telnet
- status: the Access Point is running properly and over telnet or ssh accessable from the network.
- login and execute the dir command.
- using the archive command.
1. execute dir to see the flash: content
XY_TEST33#dir
Directory of flash:/
2 -rwx 6168 Oct 29 2014 13:57:54 +00:00 private-multiple-fs
4 drwx 128 Jan 1 1970 00:22:55 +00:00 c1240-rcvk9w8-mx
15 drwx 448 Oct 29 2014 13:46:35 +00:00 c1240-k9w8-mx.124-25e.JAO6
13 -rwx 9891 Oct 29 2014 13:55:58 +00:00 event.log
7 drwx 0 Mar 1 2002 00:00:29 +00:00 configs
9 -rwx 184 Oct 29 2014 13:57:53 +00:00 env_vars
2. to see what IOS image is present at BOOT variable
XY_TEST33#more flash:/env_vars | i BOOT
BOOT=flash:/c1240-k9w8-mx.124-25e.JAO6/c1240-k9w8-mx.124-25e.JAO6
XY_TEST33#
3. to test the archive overwrite command – rename the IOS Images
XY_TEST33#dir
Directory of flash:/
2 -rwx 17570 Oct 29 2014 14:31:50 +00:00 config.txt
3 -rwx 3570 Oct 29 2014 14:31:50 +00:00 private-config
4 drwx 128 Jan 1 1970 00:22:55 +00:00 c1240-rcvk9w8-mx
15 drwx 448 Oct 29 2014 13:46:35 +00:00 c1240-k9w8-mx.124-25e.JAO6
8 -rwx 7192 Oct 29 2014 14:31:50 +00:00 private-multiple-fs
13 -rwx 9891 Oct 29 2014 13:55:58 +00:00 event.log
7 drwx 0 Mar 1 2002 00:00:29 +00:00 configs
9 -rwx 184 Oct 29 2014 13:57:53 +00:00 env_vars
15740928 bytes total (8806400 bytes free)
XY_TEST33#rename c1240-rcvk9w8-mx test
Destination filename [test]?
XY_TEST33#rename c1240-k9w8-mx.124-25e.JAO6 test2
Destination filename [test2]?
XY_TEST33#dir
Directory of flash:/
2 -rwx 17570 Oct 29 2014 14:31:50 +00:00 config.txt
3 -rwx 3570 Oct 29 2014 14:31:50 +00:00 private-config
4 drwx 128 Jan 1 1970 00:22:55 +00:00 test
15 drwx 448 Oct 29 2014 13:46:35 +00:00 test2
8 -rwx 7192 Oct 29 2014 14:31:50 +00:00 private-multiple-fs
13 -rwx 9891 Oct 29 2014 13:55:58 +00:00 event.log
7 drwx 0 Mar 1 2002 00:00:29 +00:00 configs
9 -rwx 184 Oct 29 2014 13:57:53 +00:00 env_vars
15740928 bytes total (8806400 bytes free)
4. starting the archive command
XY_TEST33#archive download-sw /overwrite tftp://10.10.10.130/c1240-rcvk9w8-tar.123-11JX1.tar
examining image…
Loading c1240-rcvk9w8-tar.123-11JX1.tar from 10.10.10.130 (via BVI1): !
extracting info (273 bytes)
Image info:
Version Suffix: rcvk9w8-
Image Name: c1240-rcvk9w8-mx
Version Directory: c1240-rcvk9w8-mx
Ios Image Size: 1874432
Total Image Size: 1874432
Image Feature: WIRELESS LAN|LWAPP|RECOVERY
Image Family: C1240
Wireless Switch Management Version: 3.0.51.0
Extracting files…
c1240-rcvk9w8-mx/ (directory) 0 (bytes)
extracting c1240-rcvk9w8-mx/c1240-rcvk9w8-mx (1865438 bytes)!!!!!!!
extracting c1240-rcvk9w8-mx/info (273 bytes)
extracting info.ver (273 bytes)
[OK – 1873920 bytes]
New software image installed in flash:/c1240-rcvk9w8-mx
Configuring system to use new image…done.
archive download: takes 24 seconds
XY_TEST33#dir
Directory of flash:/
2 -rwx 17570 Oct 29 2014 14:31:50 +00:00 config.txt
3 -rwx 3570 Oct 29 2014 14:31:50 +00:00 private-config
4 drwx 128 Jan 1 1970 00:22:55 +00:00 test
15 drwx 448 Oct 29 2014 13:46:35 +00:00 test2
8 -rwx 7192 Oct 29 2014 14:31:50 +00:00 private-multiple-fs
13 -rwx 9891 Oct 29 2014 13:55:58 +00:00 event.log
7 drwx 0 Mar 1 2002 00:00:29 +00:00 configs
11 drwx 128 Oct 29 2014 14:41:30 +00:00 c1240-rcvk9w8-mx
24 -rwx 164 Oct 29 2014 14:41:30 +00:00 env_vars
15740928 bytes total (6940160 bytes free)
5. adjusting of the boot variable
XY_TEST33#cd c1240-rcvk9w8-mx
XY_TEST33#dir
Directory of flash:/c1240-rcvk9w8-mx/
12 -rwx 1865438 Oct 29 2014 14:41:30 +00:00 c1240-rcvk9w8-mx
14 -rwx 273 Oct 29 2014 14:41:30 +00:00 info
XY_TEST33(config)#boot system flash:/c1240-rcvk9w8-mx/c1240-rcvk9w8-mx
XY_TEST33(config)#end
3. downloading automatically from rommon mode and access an tftp server
In some cases, after pressing the mode button on an access point and starting up in rommon mode.
The access point shows the default tftp path.
For example:
rommon output….
image_recovery: Download default IOS tar image tftp://255.255.255.255/ap3g2-k9w7-tar.default
flash is writable
FLASH CHIP: Numonyx Mirrorbit (0089)
Xmodem file system is available.
flashfs[0]: 50 files, 8 directories
flashfs[0]: 0 orphaned files, 0 orphaned directories
flashfs[0]: Total bytes: 31997952
flashfs[0]: Bytes used: 13762560
flashfs[0]: Bytes available: 18235392
flashfs[0]: flashfs fsck took 17 seconds.
Reading cookie from SEEPROM
Base Ethernet MAC address: e4:d3:f1:1e:a3:64
Ethernet speed is 100 Mb – FULL Duplex
button is pressed, wait for button to be released…
button pressed for 23 seconds
process_config_recovery: set IP address and config to default 10.0.0.1
process_config_recovery: image recovery
image_recovery: Download default IOS tar image tftp://255.255.255.255/ap3g2-k9w7-tar.default
- start your tftp server
- adjust your NIC Interface (for example) with the IP address 10.0.0.3 and a netmask (for example 255.0.0.0) of your choice
- rename the right IOS Image with the name ap3g2-k9w7-tar.default
- it’s not important if the IOS image is a LWAPP or an autonomous IOS Image
- press the mode button for approximately 10 sec. and release the mode button
- the access point connect automatically at startup the tftp server and download the IOS Image and overwrite the existing path and folder on the flash:
- after extracting the IOS tar file to flash, the access point will boot up with the proper boot variable and IOS Image


